Install the toolchain
Get started with Midnight, whether you are here to use privacy-preserving applications or to build them. This guide covers wallet setup for all users, and additional development tools for builders.
For users, you will install the Lace Midnight Preview wallet, Docker Desktop to run the proof server, and obtain test tokens. For developers, you will also install the Compact toolchain, and run the proof server.
Prerequisites
Before you begin, ensure you have:
- Google Chrome browser installed
- Basic familiarity with command-line operations
- Administrative privileges on your computer (for installing Docker and Compact)
Install the Lace Midnight Preview wallet
This section walks you through the process of installing the Lace Midnight Preview wallet, creating a new wallet, and getting test tokens.
Download and install the Lace wallet extension
Lace Midnight Preview wallet is a browser extension for the Midnight Network. It is currently only compatible with Google Chrome. Here's how to install it:
Verification: The Lace wallet icon appears in your Chrome toolbar.
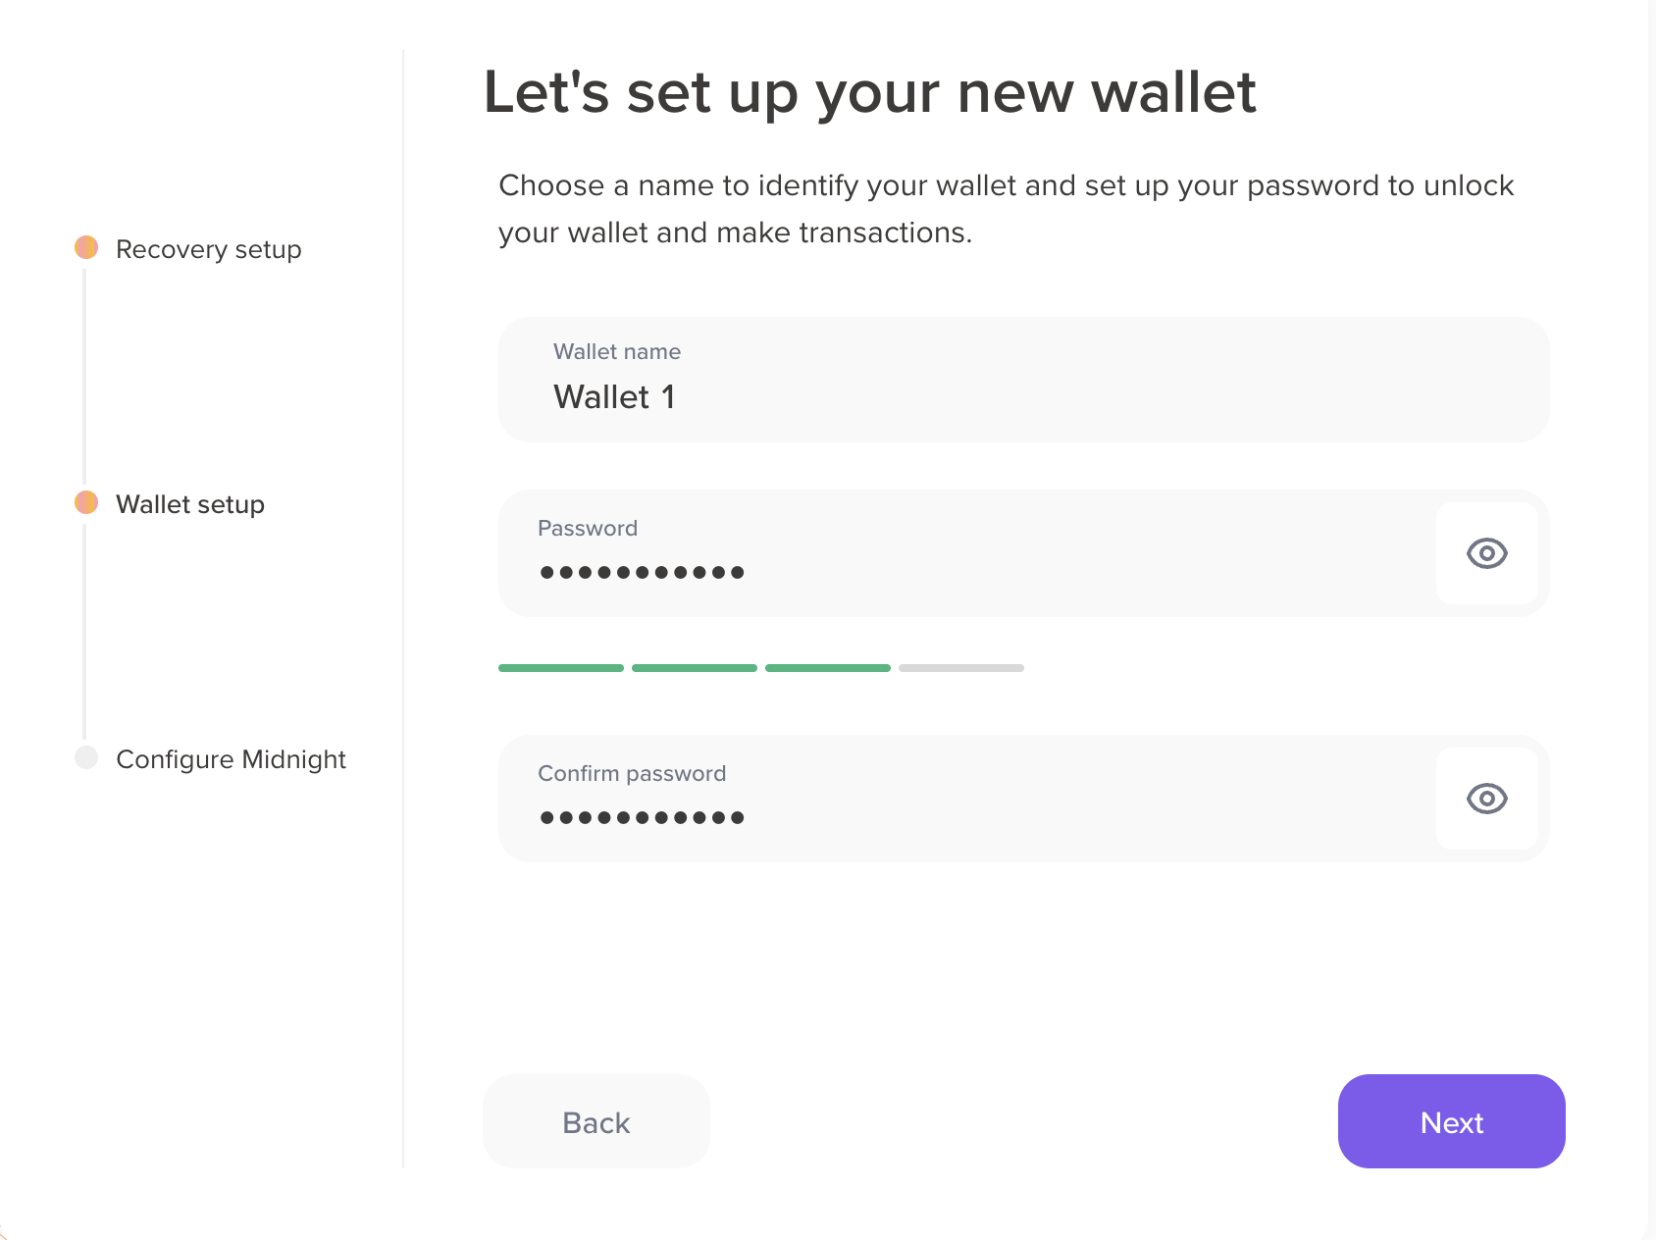
Create your wallet
To create a new wallet, follow these steps:
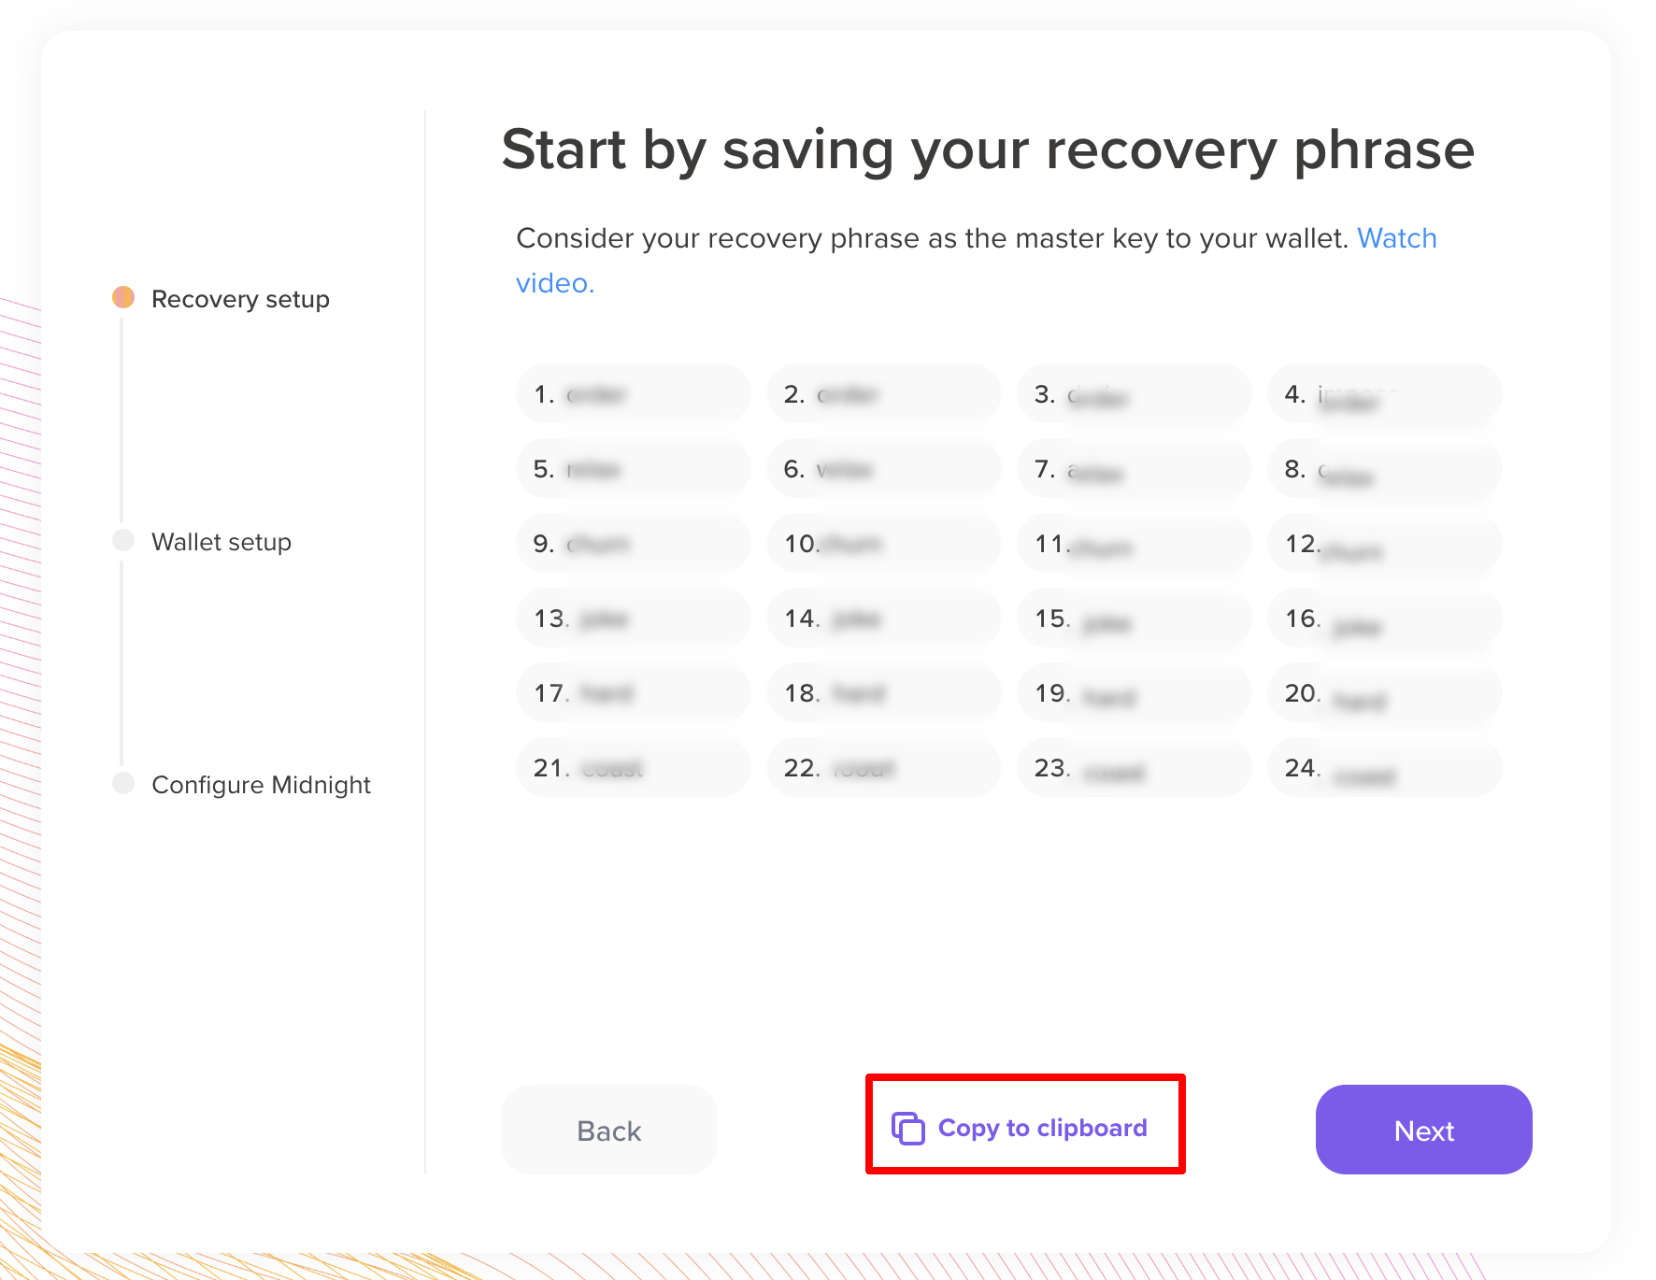
Write down your seed phrase on paper and store it in a secure, offline location. Never store it digitally or share it.
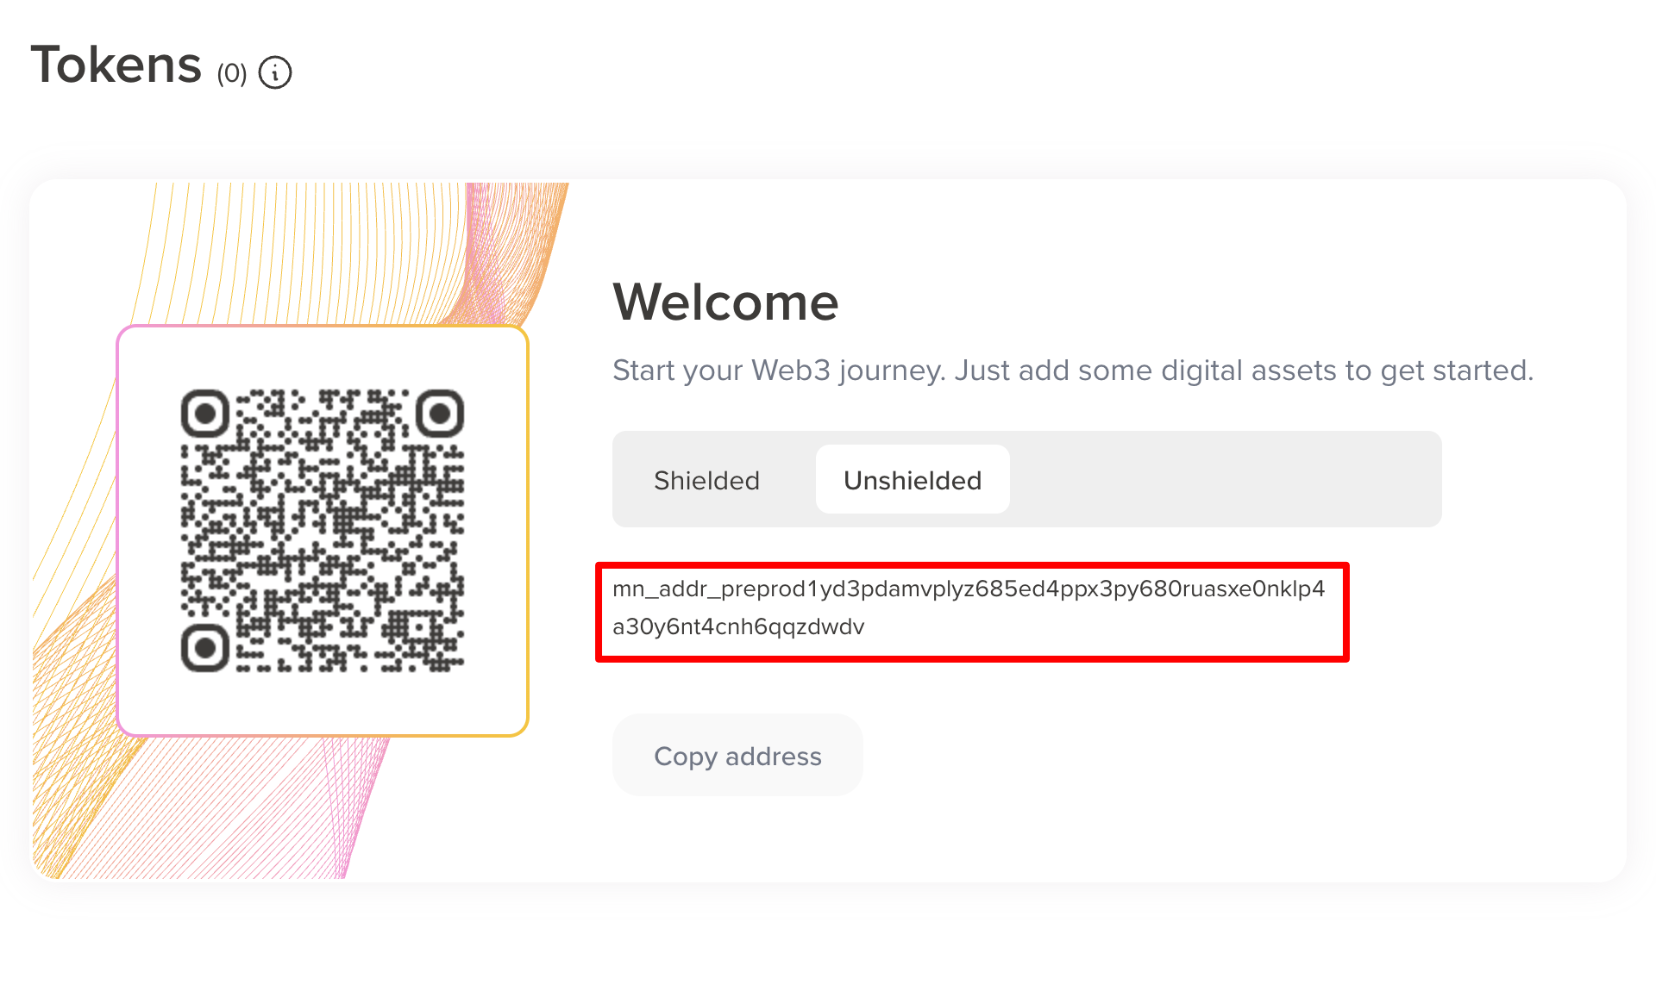
Verification: Your wallet dashboard opens, showing your shielded and unshielded wallet addresses.
Get test tokens (tDUST)
tDUST is the network resource used to process transactions and interact with DApps on the Midnight Network. It has no real-world value and is used for testing transactions and interacting with DApps.
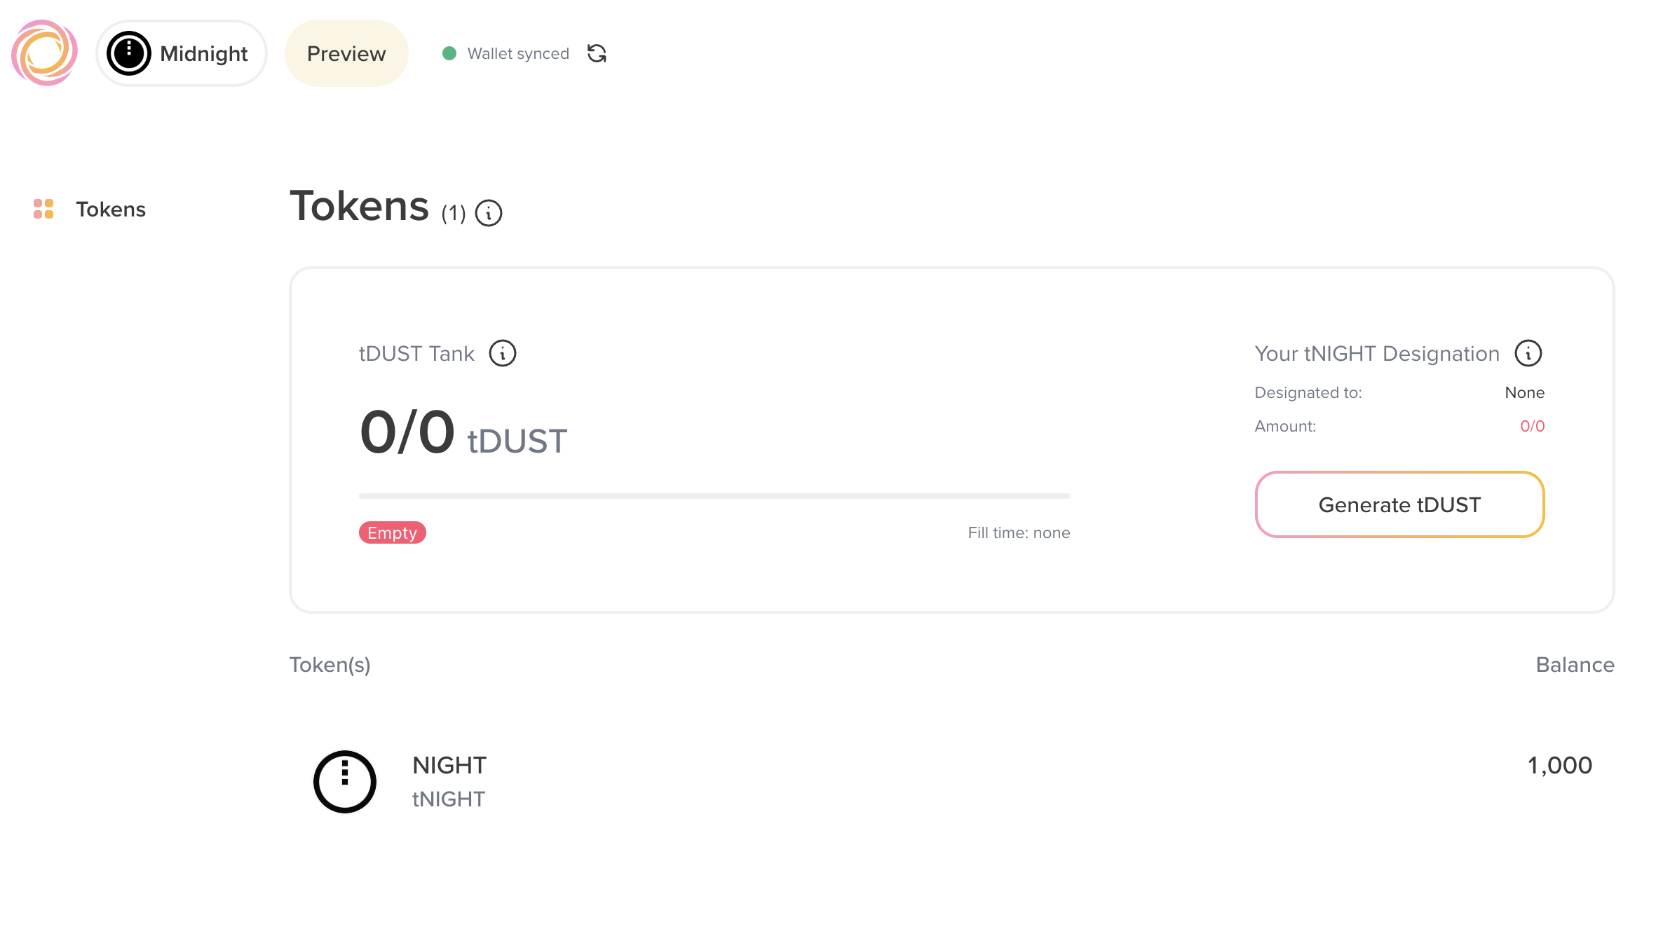
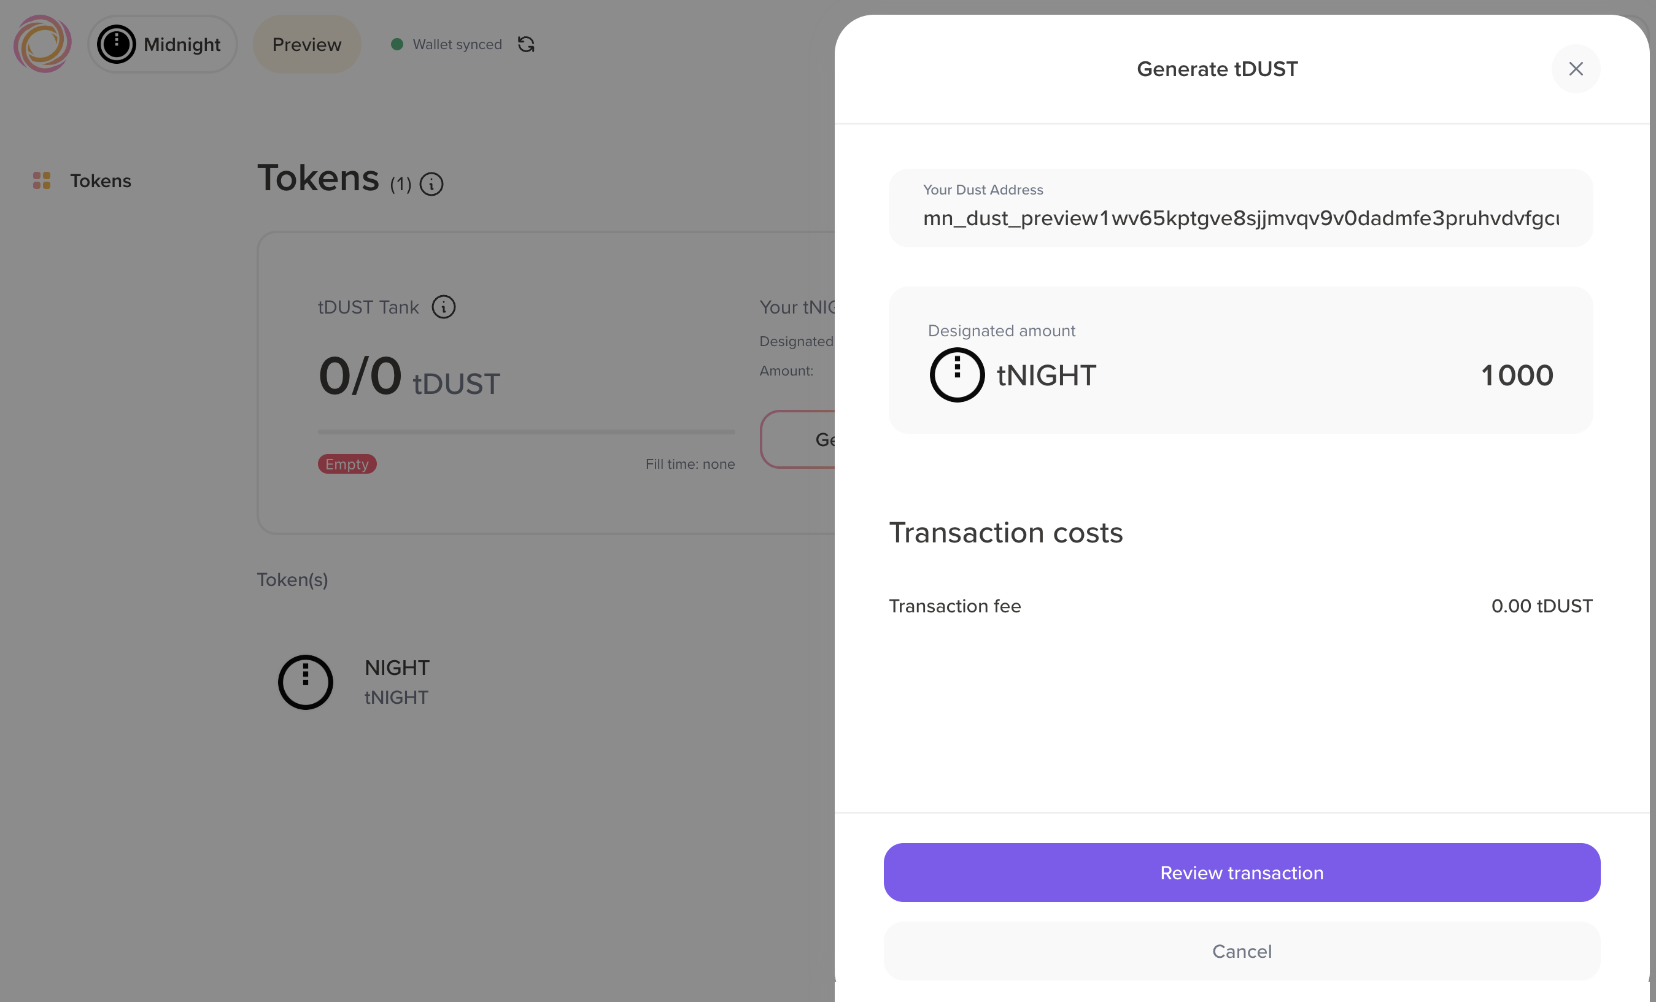
Verification: Your Lace wallet shows a new balance of tDUST tokens.
You are now ready to interact with DApps. To start building on Midnight, continue with these additional setup steps for the development environment.
Install Compact
This section walks you through the process of installing the Compact compiler and setting a default compiler version.
Install Compact using the installer script
Compact is Midnight's dedicated smart contract language for creating decentralized applications (DApps) that allows developers to control the level of data protection in their applications.
Use the following command to install the pre-built binaries:
curl --proto '=https' --tlsv1.2 -LsSf https://github.com/midnightntwrk/compact/releases/latest/download/compact-installer.sh | sh
Update your shell PATH
The installer script automatically adds Compact to your shell's PATH. However, you need to restart your terminal or reload your shell configuration for the changes to take effect.
To reload your shell configuration without restarting, run the following command:
source ~/.zshrc # for zsh
# or
source ~/.bashrc # for bash
Manual PATH configuration (only if needed): If Compact is not found after restarting, manually add it to your PATH:
export PATH="$HOME/.compact/bin:$PATH"
Then reload your shell configuration as shown above.
Update the compiler version
Update to the latest compiler version:
compact update
This command downloads the latest version of the Compact compiler and sets it as the default version.
Verify the Compact installation
Run these commands to verify your installation:
compact --version # print the version of Compact
compact compile --version # print the version of the compiler
which compact     # print the installation path
Verification: These commands return the Compact version number, the compiler version number, and the installation path.
Set up the proof server
This section walks you through the process of installing Docker Desktop and running the proof server.
Install Docker Desktop
The proof server is required to generate zero-knowledge proofs for transactions locally. It runs as a background service using Docker.
If you don't have Docker, download and install Docker for your operating system (macOS, Windows, or Linux):
- Get Docker here: https://www.docker.com/products/docker-desktop/
Run the proof server
Use the following command to start the proof-server in your terminal:
docker run -p 6300:6300 midnightntwrk/proof-server:7.0.0 -- midnight-proof-server -v
This command occupies the terminal window while running.
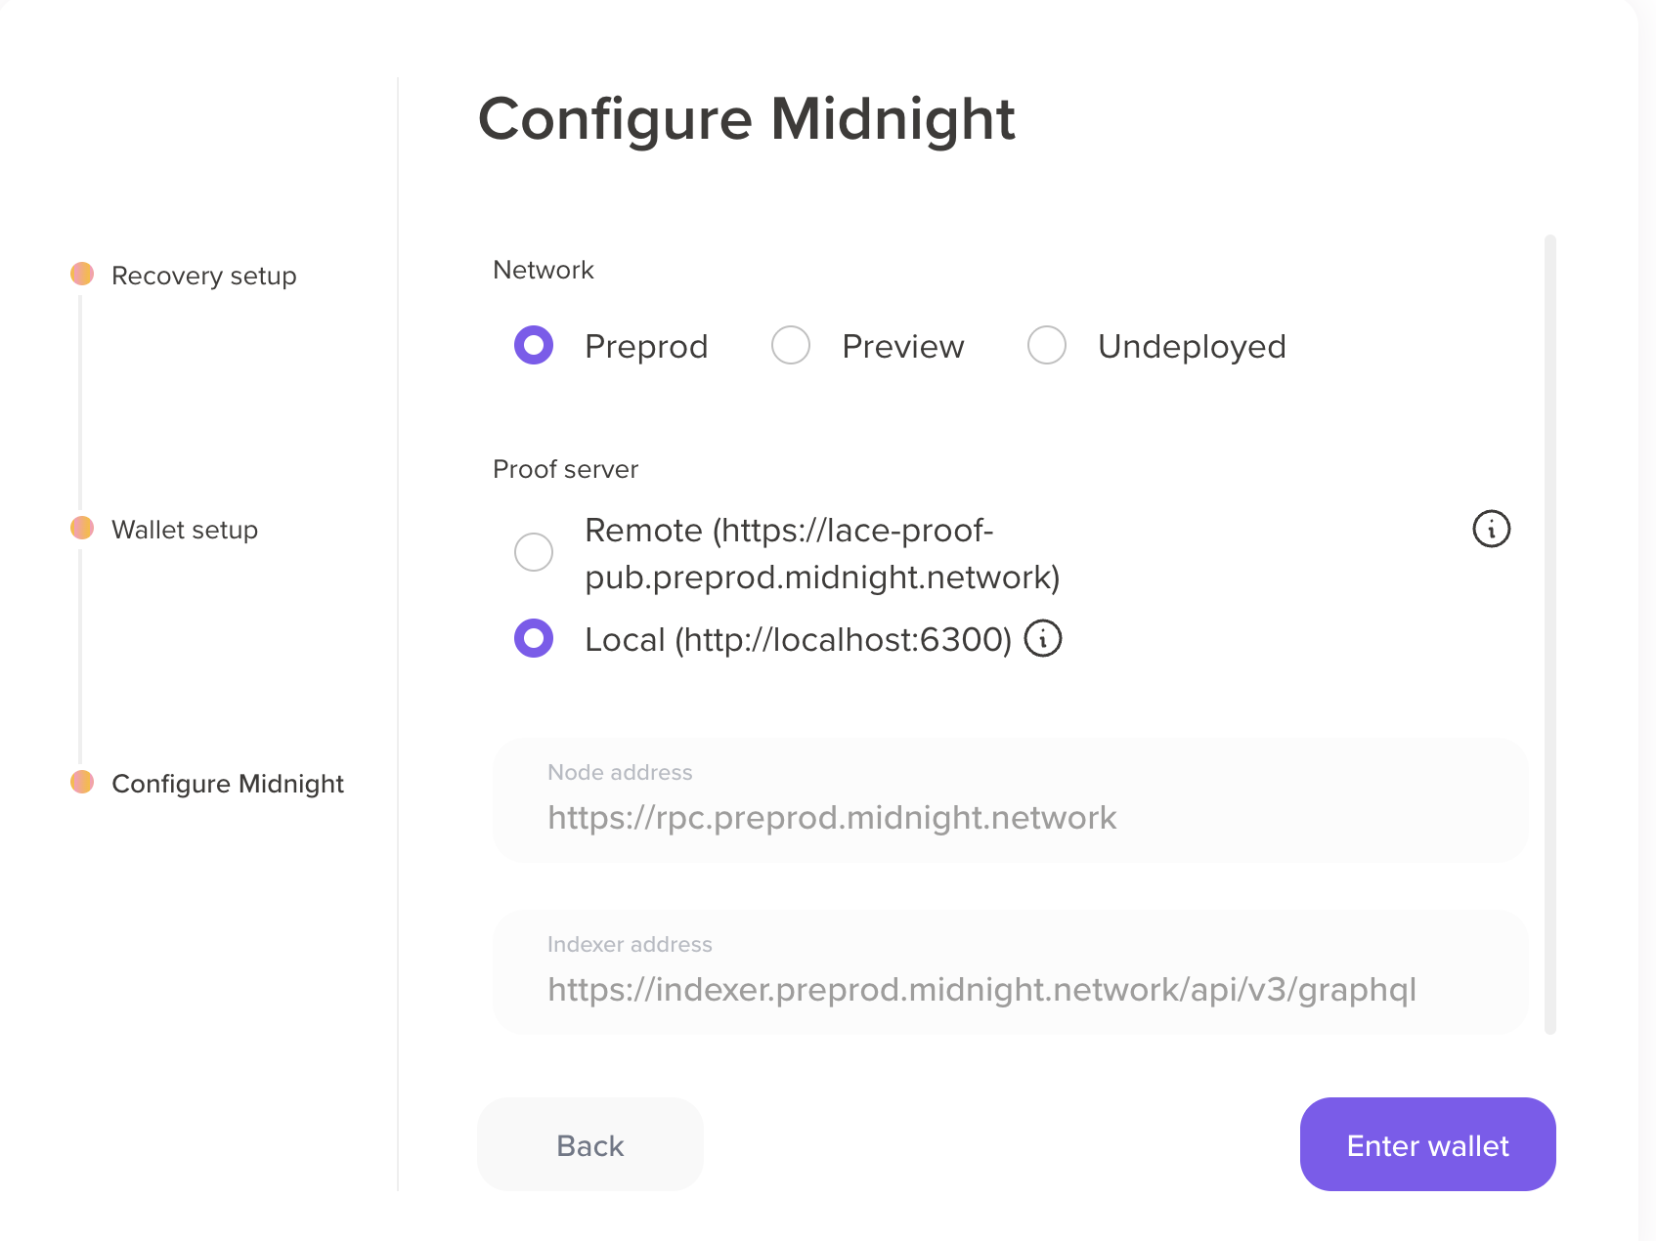
Verification: The terminal displays logs indicating the server is running and listening at http://localhost:6300.
To use a local proof-server with Lace Midnight Preview wallet, go to Settings » Midnight and select Local (http://localhost:6300).
Install the Compact VS Code extension
The Compact VS Code extension provides helpful syntax highlighting and code snippet completion. To install it, follow these steps:
Verification: You now see the Compact Language Support extension in your installed VS Code extensions.
Your development environment is now configured. You are ready to start building and interacting with privacy-preserving applications on Midnight.
Troubleshoot
This section covers common issues that you might encounter during installation and their solutions.
Compact binary not found
If you see this error:
compact: command not found
This means the Compact binary is not in your PATH. Follow the instructions in Update your shell PATH to add it to your PATH.
Docker Desktop not running
If you encounter connection errors when starting the proof server, ensure Docker Desktop is running:
- Open Docker Desktop application.
- Wait for the Docker engine to start (the Docker icon in your system tray should be steady, not animated).
- Try running the proof server command again.
Port already in use
If you see an error that port 6300 is already in use:
Error: bind: address already in use
Either stop the process using port 6300, or run the proof server on a different port:
docker run -p 6301:6300 midnightntwrk/proof-server:7.0.0 -- midnight-proof-server -v
Remember to update your application configuration to use the new port.
Next steps
Now that your development environment is set up, you can: